Since a few days there is a Scripting API for the Interactive Voice Response System (IVR) called Telekom Tropo. Thanks to this API it is easy to start immediately scripting your text messages without the need of a self-maintained infrastructure: All you need is internet access (which you probably have while reading this article) and a phone capable receiving text messages (SMS).
1. Sign-in
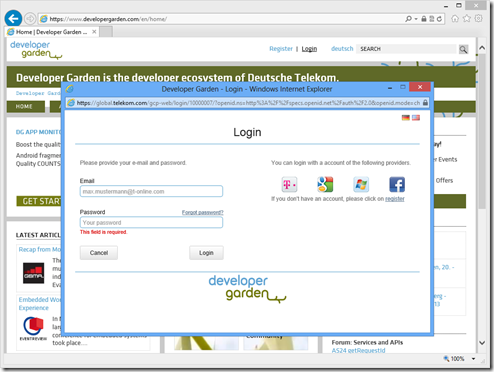
To start your first IVR project you need to be registered and logged in at Developer Garden. You find a detailed description of this 3-step-process in my blog.
2. Activate Telekom Tropo
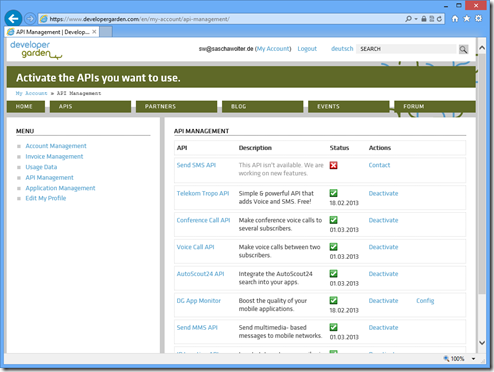
Once logged-in go to the “My Account” page and select the API Management to activate the Telekom Tropo usage.
3. Add an application
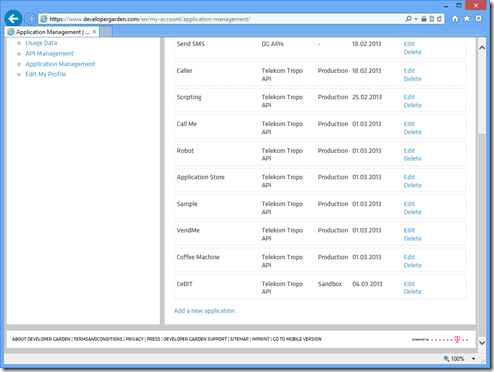
In this step you create your application. First select the Application Management. Please do not get confused because of the image above: I have already created a bunch off applications – in your case this dialog might be more or less empty.
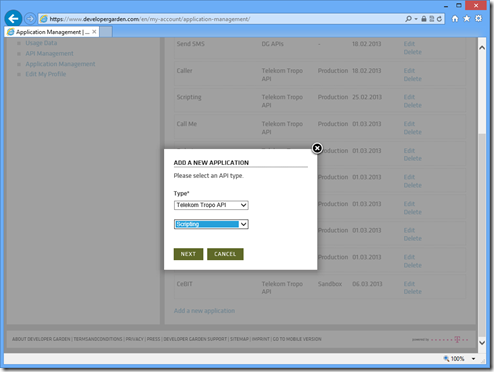
Finally click on “Add a new application”. A dialog appears where you select the type of your application which indeed is Telekom Tropo here. Furthermore you can choose Scripting or Web API. For this tutorial I recommend Scripting, because no hosting is required by you. And don´t worry, you can change this setting at any time.
If you are curious about the differences between the new Scripting API and the legacy Web API, here are some facts:
- Use Web API for your own hosting (as long as your hosting is basically capable of HTTP, JSON and XML)
- Using the Scripting API the hosting and maintenance is done by Developer Garden (the Scripting API allows hosting up to 200 MByte).
Please see my Quickstart Telekom Tropo for more details on the Web API:
- Quickstart Telekom Tropo Web API: Hello World (German)
- Quickstart Telekom Tropo Web API: Text to speech and voices (German)
- Generic SMS and Voice service with Telekom Tropo Web API (English)
4. Create your code
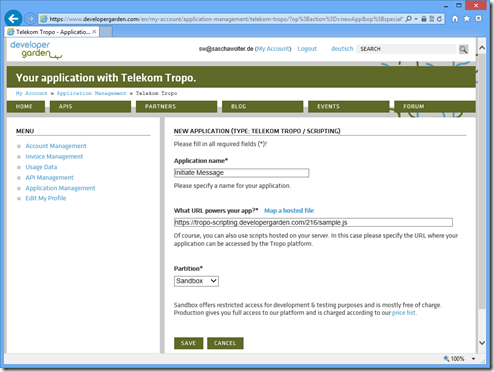
In the settings page of your application click on “Map a hosted file” to create, upload, edit or delete your code.
For testing purpose we use the sandbox mode. This mode is free of charge, but has some limitations: E.g. only 10 SMS per day are allowed and each SMS contains the text “SMS API by developergarden.com”.
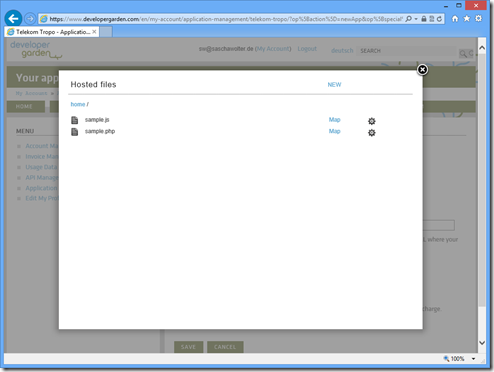
Clicking on the “NEW” menu and selecting “create file” generates a code file of the language of your choice – therefore make sure to use the right suffix (e.g. .js for JavaScript). The Scripting API supports a couple of dynamic languages on top of Java:
- Javascript – Rhino – 1.7_R1 / ECMA-262 Edition 3
- Groovy – Groovy – 1.6.0
- PHP Quercus – 4.0.14 (equivalent to PHP 5.3.2)
- Python – Jython – 2.5.2 (equivalent to Python 2.5)
- Ruby – JRuby – 1.6.1 (equivalent to Ruby 1.9)
After you have created the file, an editor opens. To be honest, this editor is very rudimentary, but sufficient for simple scenarios (if you do not like it, use your own editor instead and upload the file here).
The Scripting API supports most of the “standard” libraries provided with that language’s Java implementation as well as the Java API available in the underlying JDK. You can find more info here:
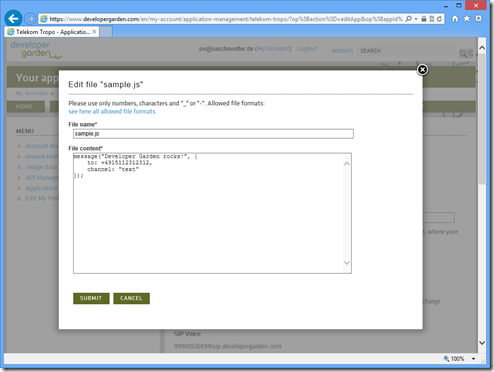
In the screenshot above we use JavaScript, but the code for sending a text message (SMS) looks very similar in all available languages. Just use your favorite and paste it in the editor:
JavaScript:
message("Developer Garden rocks!", {
   to:"+14075550100",
   channel:"text",
   network:"SMS"
}); |
message("Developer Garden rocks!", {
to:"+14075550100",
channel:"text",
network:"SMS"
});
Ruby:
message "Developer Garden rocks!", {
   :to => "+14075550100",
   :channel => "text",
   :network => "SMS"
}; |
message "Developer Garden rocks!", {
:to => "+14075550100",
:channel => "text",
:network => "SMS"
};
PHP:
<?php
message("Developer Garden rocks!", array(
   "to" => "+14075550100",
   "channel" => "text",
   "network" => "SMS"
));
?> |
<?php
message("Developer Garden rocks!", array(
"to" => "+14075550100",
"channel" => "text",
"network" => "SMS"
));
?>
Python:
message("Developer Garden rocks!", {
   "to":"+14075550100",
   "channel":"text",
   "network":"SMS"
}) |
message("Developer Garden rocks!", {
"to":"+14075550100",
"channel":"text",
"network":"SMS"
})
Groovy:
message("Developer Garden rocks!", [
   "to":"+14075550100",
   "channel":"text",
   "network":"SMS"
]) |
message("Developer Garden rocks!", [
"to":"+14075550100",
"channel":"text",
"network":"SMS"
])
Finally submit your code and make sure to map the desired file clicking on “Map”.
5. Run your application
You have two options to use your application. Either call a certain phone number (which you have to assign first in the applications settings) or just call a URI via the Telekom Tropo Rest API. As long as you do not have a phone number to assign, we do the latter.
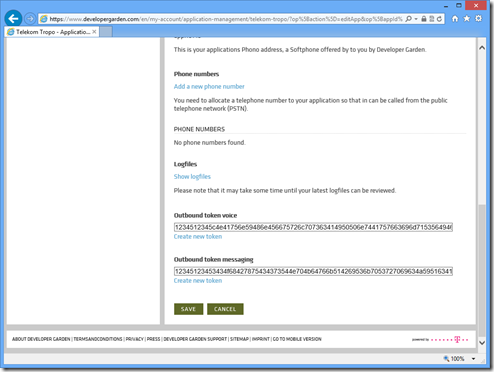
To initiate an outbound call or text message you need just two things: The URI for the used Rest API and a token to identify your application (for security reasons do not make the token public). The URI looks like:
https://tropo.developergarden.com/api/sessions?action=create&token=TOKEN
The token is available in your applications settings. There you can create a new token as well.
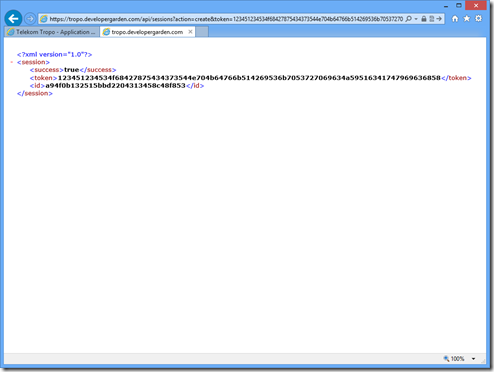
This URI now starts your application identified via the used token. And your application itself sends a text message to the given phone number. That´s it…
If you need further information or if you like to test an incoming call with a SIP client, please see the official Telekom Tropo documentation.


