Tag Archives: PHP

Initiate your first text message (SMS) via HTTP

Since a few days there is a Scripting API for the Interactive Voice Response System (IVR) called Telekom Tropo. Thanks to this API it is easy to start immediately scripting your text messages without the need of a self-maintained infrastructure: All you need is internet access (which you probably have while reading this article) and a phone capable receiving text messages (SMS).

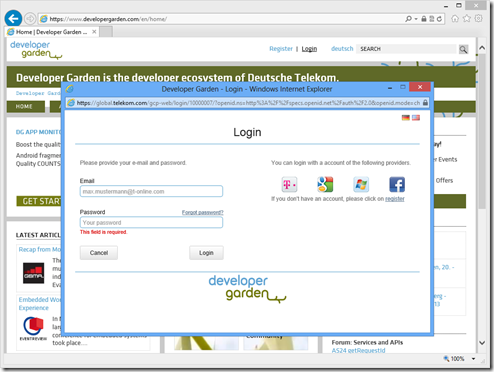
1. Sign-in

02_login

To start your first IVR project you need to be registered and logged in at Developer Garden. You find a detailed description of this 3-step-process in my blog.

2. Activate Telekom Tropo

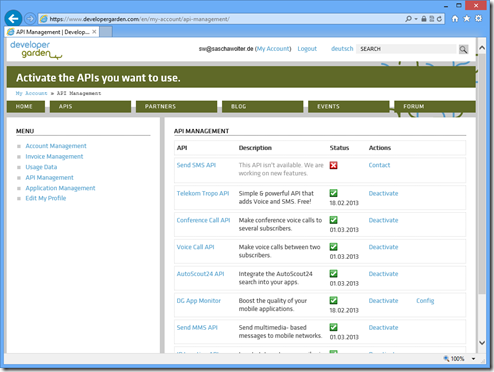
04_api_management

Once logged-in go to the “My Account” page and select the API Management to activate the Telekom Tropo usage.

3. Add an application

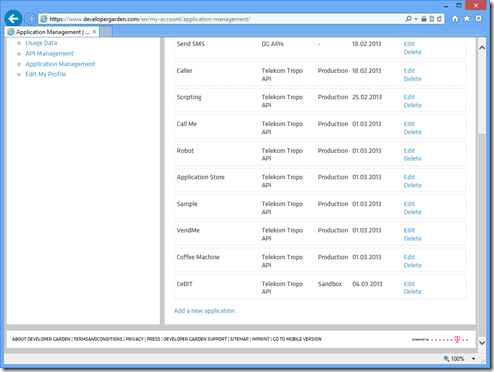
05_application_management

In this step you create your application. First select the Application Management. Please do not get confused because of the image above: I have already created a bunch off applications – in your case this dialog might be more or less empty.

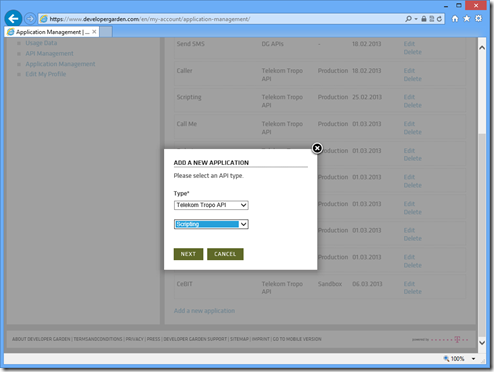
06_add_application

Finally click on “Add a new application”. A dialog appears where you select the type of your application which indeed is Telekom Tropo here. Furthermore you can choose Scripting or Web API. For this tutorial I recommend Scripting, because no hosting is required by you. And don´t worry, you can change this setting at any time.

If you are curious about the differences between the new Scripting API and the legacy Web API, here are some facts:

  • Use Web API for your own hosting (as long as your hosting is basically capable of HTTP, JSON and XML)
  • Using the Scripting API the hosting and maintenance is done by Developer Garden (the Scripting API allows hosting up to 200 MByte).

Please see my Quickstart Telekom Tropo for more details on the Web API:

  1. Quickstart Telekom Tropo Web API: Hello World (German)
  2. Quickstart Telekom Tropo Web API: Text to speech and voices (German)
  3. Generic SMS and Voice service with Telekom Tropo Web API (English)

4. Create your code

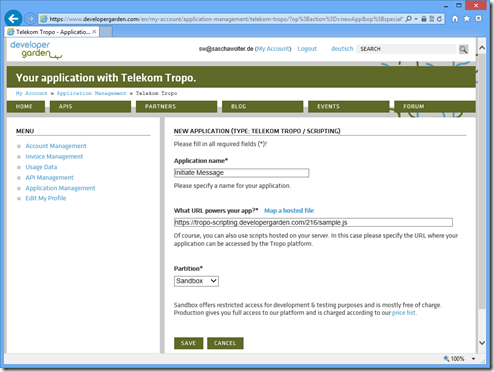
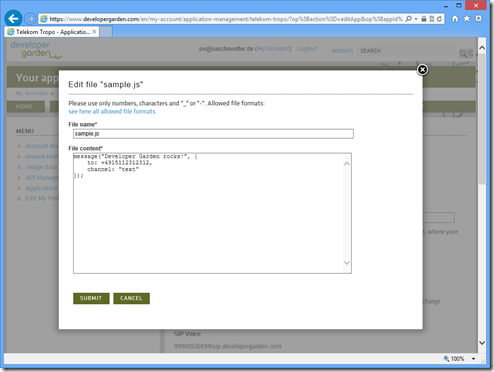
09_edit_basic_settings

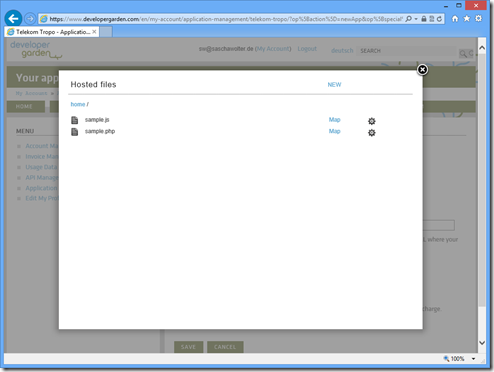
In the settings page of your application click on “Map a hosted file” to create, upload, edit or delete your code.

For testing purpose we use the sandbox mode. This mode is free of charge, but has some limitations: E.g. only 10 SMS per day are allowed and each SMS contains the text “SMS API by developergarden.com”.

07_create_hosted_file

Clicking on the “NEW” menu and selecting “create file” generates a code file of the language of your choice – therefore make sure to use the right suffix (e.g. .js for JavaScript). The Scripting API supports a couple of dynamic languages on top of Java:

  • Javascript – Rhino – 1.7_R1 / ECMA-262 Edition 3
  • Groovy – Groovy – 1.6.0
  • PHP Quercus – 4.0.14 (equivalent to PHP 5.3.2)
  • Python – Jython – 2.5.2 (equivalent to Python 2.5)
  • Ruby – JRuby – 1.6.1 (equivalent to Ruby 1.9)

After you have created the file, an editor opens. To be honest, this editor is very rudimentary, but sufficient for simple scenarios (if you do not like it, use your own editor instead and upload the file here).

The Scripting API supports most of the “standard” libraries provided with that language’s Java implementation as well as the Java API available in the underlying JDK. You can find more info here:

08_edit_hosted_file

In the screenshot above we use JavaScript, but the code for sending a text message (SMS) looks very similar in all available languages. Just use your favorite and paste it in the editor:

JavaScript:

message("Developer Garden rocks!", {
   to:"+14075550100",
   channel:"text",
   network:"SMS"
});

Ruby:

message "Developer Garden rocks!", { 
   :to => "+14075550100",
   :channel => "text",
   :network => "SMS"
};

PHP:

<?php
message("Developer Garden rocks!", array( 
   "to" => "+14075550100", 
   "channel" => "text",
   "network" => "SMS"
));
?>

Python:

message("Developer Garden rocks!", { 
   "to":"+14075550100", 
   "channel":"text",
   "network":"SMS"
})

Groovy:

message("Developer Garden rocks!", [ 
   "to":"+14075550100", 
   "channel":"text",
   "network":"SMS"
])

Finally submit your code and make sure to map the desired file clicking on “Map”.

5. Run your application

You have two options to use your application. Either call a certain phone number (which you have to assign first in the applications settings) or just call a URI via the Telekom Tropo Rest API. As long as you do not have a phone number to assign, we do the latter.

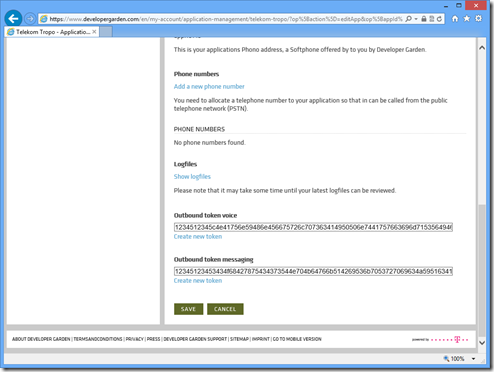
10_edit_advanced_settings

To initiate an outbound call or text message you need just two things: The URI for the used Rest API and a token to identify your application (for security reasons do not make the token public). The URI looks like:

https://tropo.developergarden.com/api/sessions?action=create&token=TOKEN

The token is available in your applications settings. There you can create a new token as well.

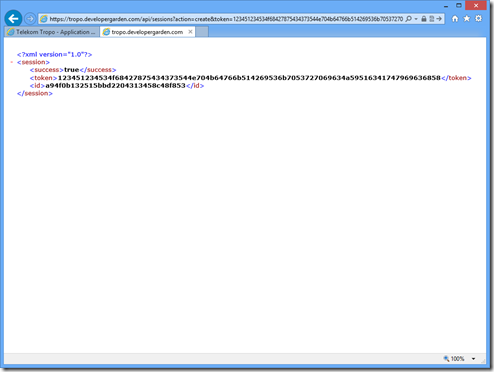
11_url_call

This URI now starts your application identified via the used token. And your application itself sends a text message to the given phone number. That´s it…

If you need further information or if you like to test an incoming call with a SIP client, please see the official Telekom Tropo documentation.
Generic SMS and Voice service, Telekom Tropo Part 3

Building M2M prototypes with voice (phone) and text (SMS) isn´t that hard. In most cases we only need a way to send a message via SMS or via phone. But once done you get bored doing it over and over again. Hence I build a simple (and quick and dirty) service for these needs (based on PHP but you can use nearly any language for your choice). This service just gets the needed parameters via URL. Based on these parameters a message will be sent or call initiated.

1
2
3
4
5
6
7
8
9
10
11
12
13
14
15
16
17
18
19
20
21
22
<?php
// Include Tropo classes.
require('tropo.class.php');
 
// $session = new Session(); or low-level usage of JSON:
$session= json_decode(file_get_contents("php://input"));
$message= $session->session->parameters->message;
$numberToDial= $session->session->parameters->numberToDial;
$method = $session->session->parameters->method;
 
$tropo = new Tropo();
 
if ($method == "text") {
	$tropo->message($message, array("network" => "SMS", "to" => $numberToDial));	
} else // if ($method == "call")  {	
	$tropo->call($numberToDial);	
	$options = array("voice" => "Simon");
	$tropo->say($message, $options);
	$tropo->hangup();
}
$tropo->renderJson();
?>

After you have assigned this script to your Tropo application (see Quickstart Tropo, sorry only available in German right now), you need the appropriated token (which you find in your application settings). Finally call the service via a simple URL request. Please note, the values have to be URL encoded and the phone number must include the country code including the plus sign. In HTML this could look like:

1
<a href="https://tropo.developergarden.com/api/sessions?token=YOUR_TOKEN&method=TEXT_OR_VOICE&message=YOUR_TEXT&numberToDial=YOUR_PHONE_NUMBER">Send SMS</a>

Using jQuery it looks like:

1
2
3
4
5
6
7
8
9
$.ajax({
   url: "https://tropo.developergarden.com/api/sessions",
   data: {
      "numberToDial": "YOUR_PHONE_NUMBER",
      "message": "YOUR_TEXT",
      "token": "YOUR_TOKEN",
      "method": " TEXT_OR_VOICE"
   }
});

And it seems this will become even easier, because the Tropo Scripting API is on its way. Stay tuned…

Schnelleinstieg Sprachdialogsystem Telekom Tropo, Teil 2

Nachdem wir im ersten Teil der Telekom Tropo Einführung die ersten Schritte bis zum obligatorischen Hallo-Welt-Beispiel durchgeführt haben, geht es nun darum, dem gesprochenen Text ein wenig mehr Ausdruck zu geben. Sprich: Wie kann ich die Sprachausgabe und die eigentliche Stimme genauer beeinflussen?

Neben der Sprachsynthese Text2Speech lassen sich auch eigene Aufnahmen in Form von Audio-Dateien einbinden. Für diese offensichtlich freiste Form der Tonausgabe muss im Text nur die entsprechende URL referenziert werden:

1
2
3
4
5
6
7
<?php
// Include Tropo classes.
require('tropo.class.php');
$tropo = new Tropo();
$tropo->say("Hello Tropo! http://www.phono.com/audio/troporocks.mp3");
$tropo->renderJson();
?>

Wichtig ist jedoch, dass die Tonqualität in der Ausgabe möglicherweise von der Ausgangsqualität abweicht. Denn Tropo nutzt für die Ausgabe das für Telefonie optimierte Audioformat u-law (8bit, 8Khz).

Aber auch die Text2Speech-Funktion von Tropo verfügt über umfangreiche Stellschrauben. Die eigentliche Stimme wird abhängig von Sprache und Geschlecht (ich mag die britischen Stimmen Elizabeth, Kate und Simon) als einfacher Parameter namens voice angegeben:

1
2
3
4
5
6
7
8
9
<?php
// Include Tropo classes.
require('tropo.class.php');
// Say it with voice
$tropo = new Tropo();
$options = array("voice" => "Katrin");
$tropo->say("Hallo Welt!", $options);
$tropo->renderJson();
?>

Noch mehr Einfluss erlaubt die XML basierte Speech Synthesis Markup Language (SSML). Damit lassen sich u. a. Pausen definieren, der Satzrhythmus (Geschwindigkeit) variieren, Maßeinheiten (Währung) festlegen, Zeitangaben kontrollieren und Phoneme nutzen:

1
2
3
4
5
6
7
8
9
10
<?php
// Include Tropo classes.
require('tropo.class.php');
// Say as XML
$tropo = new Tropo();
$options = array("voice" => "Katrin");
$tropo->say("<speak><break time='1000ms' /><prosody rate='200%'>"Herzlich Willkommen!</prosody></speak>", $options);
$tropo->say("<?xml version='1.0'?><speak>Heute ist der <say-as interpret-as='vxml:date'>20121213</say-as></speak>", $options);
$tropo->renderJson();
?>

Übrigens: Falls man in einer Anwendung häufiger die Sprechgeschwindigkeit und Pausen beeinflussen muss, dann reicht es normalerweise aus, den Text in ein speak-Element zu packen.

1
2
3
4
<speak>
   <break time='1000ms' />
   <prosody rate='200%'>"Herzlich Willkommen!</prosody>
</speak>